问题
我有一个自定义 UIView,它有一个图像和选择(边框) subview 。我希望能够添加此自定义 UIView 作为较大空白 View 的 subview 。这里有一个问题,较大的空白 View 需要将所有 subview 剪切到其边界(clipToBounds)。但是,用户可以在大空白 View 中选择自定义 UIView 之一,然后 subview 将通过边框突出显示。
问题是,由于大的空白 View 剪切到边界,所选 subview 的轮廓被切断。
我希望 subview 中的图像裁剪到大空白 View 的边界,但仍然能够看到 subview 的完整选择轮廓(由于大空白 View 的角半径而被切断。
我正在使用 UIKit 和 Swift
👎我目前拥有的:
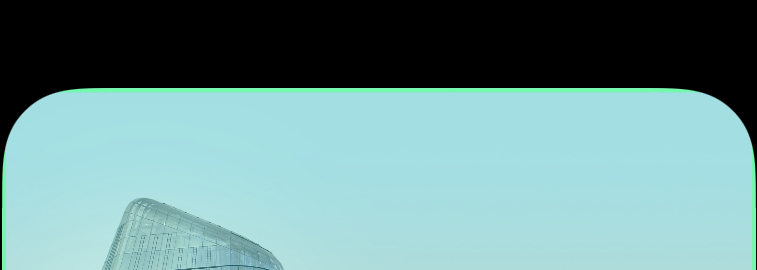
👍我想要什么:

The image part of the subview clips to the bounds (corner radius) of the large blank view, but the outline selection view in the subview should not.
预先感谢您的所有帮助!
最佳答案
我认为您正在寻找的内容在技术上是不可能的,如 defined by the docs
来自文档:
clipsToBounds
将此值设置为 true 会导致 subview 被裁剪到接收器的边界。如果设置为 false,则不会剪裁其帧超出接收器可见边界的 subview 。默认值为 false。
因此 subview 无法控制它们是否被剪切,由容器 View 决定。
所以我相信 Matic 的答案是正确的,因为他提出的结构为您提供了最大的灵活性。
话虽这么说,以下是我能想到的一些解决方法:
首先,设置重新创建您的场景
自定义UIView
// Simple custom UIView with image view and selection UIView
fileprivate class CustomBorderView: UIView
{
    private var isSelected = false
    {
        willSet
        {
            toggleBorder(newValue)
        }
    }

    var imageView = UIImageView()
    var selectionView = UIView()

    init()
    {
        super.init(frame: CGRect.zero)
        configureImageView()
        configureSelectionView()
    }

    required init?(coder: NSCoder)
    {
        fatalError("init(coder:) has not been implemented")
    }

    override func layoutSubviews()
    {
        super.layoutSubviews()
    }

    private func configureImageView()
    {
        imageView.image = UIImage(named: "image-test")
        imageView.contentMode = .scaleAspectFill
        addSubview(imageView)

        imageView.translatesAutoresizingMaskIntoConstraints = false
        imageView.leadingAnchor.constraint(equalTo: leadingAnchor).isActive = true
        imageView.topAnchor.constraint(equalTo: topAnchor).isActive = true
        imageView.trailingAnchor.constraint(equalTo: trailingAnchor).isActive = true
        imageView.bottomAnchor.constraint(equalTo: bottomAnchor).isActive = true
    }

    private func configureSelectionView()
    {
        selectionView.backgroundColor = .clear
        selectionView.layer.borderWidth = 3
        selectionView.layer.borderColor = UIColor.clear.cgColor

        addSubview(selectionView)

        selectionView.translatesAutoresizingMaskIntoConstraints = false
        selectionView.leadingAnchor.constraint(equalTo: leadingAnchor).isActive = true
        selectionView.topAnchor.constraint(equalTo: topAnchor).isActive = true
        selectionView.trailingAnchor.constraint(equalTo: trailingAnchor).isActive = true
        selectionView.bottomAnchor.constraint(equalTo: bottomAnchor).isActive = true

        configureTapGestureRecognizer()
    }

    private func configureTapGestureRecognizer()
    {
        let tapGesture = UITapGestureRecognizer(target: self,
                                                action: #selector(didTapSelectionView))
        selectionView.addGestureRecognizer(tapGesture)
    }

    @objc
    private func didTapSelectionView()
    {
        isSelected = !isSelected
    }

    private func toggleBorder(_ on: Bool)
    {
        if on
        {
            selectionView.layer.borderColor = UIColor(red: 28.0/255.0,
                                                      green: 244.0/255.0,
                                                      blue: 162.0/255.0,
                                                      alpha: 1.0).cgColor

            return
        }

        selectionView.layer.borderColor = UIColor.clear.cgColor
    }
}
然后在 View Controller 中
class ClippingTestViewController: UIViewController
{
    private let mainContainerView = UIView()
    private let customView = CustomBorderView()

    override func viewDidLoad()
    {
        super.viewDidLoad()
        view.backgroundColor = .white
        title = "Clipping view"
        configureMainContainerView()
        configureCustomBorderView()

        mainContainerView.layer.cornerRadius = 50
        mainContainerView.clipsToBounds = true
    }

    private func configureMainContainerView()
    {
        mainContainerView.backgroundColor = .white

        view.addSubview(mainContainerView)

        mainContainerView.translatesAutoresizingMaskIntoConstraints = false

        mainContainerView.leadingAnchor.constraint(equalTo: view.leadingAnchor,
                                                   constant: 20).isActive = true

        mainContainerView.topAnchor.constraint(equalTo: view.safeAreaLayoutGuide.topAnchor,
                                               constant: 20).isActive = true

        mainContainerView.trailingAnchor.constraint(equalTo: view.trailingAnchor,
                                                    constant: -20).isActive = true

        mainContainerView.heightAnchor.constraint(equalToConstant: 300).isActive = true

        view.layoutIfNeeded()
    }

    private func configureCustomBorderView()
    {
        mainContainerView.addSubview(customView)

        customView.translatesAutoresizingMaskIntoConstraints = false

        customView.leadingAnchor.constraint(equalTo: mainContainerView.leadingAnchor).isActive = true

        customView.topAnchor.constraint(equalTo: mainContainerView.safeAreaLayoutGuide.topAnchor).isActive = true

        customView.trailingAnchor.constraint(equalTo: mainContainerView.trailingAnchor).isActive = true

        customView.bottomAnchor.constraint(equalTo: mainContainerView.bottomAnchor).isActive = true

        view.layoutIfNeeded()
    }
}
这告诉我您当前的体验

解决方法 1. - 缩小选择的 subview
未选择 View 时,一切看起来都很好。选择 View 后,您可以在添加边框的同时通过一些动画来减小自定义 subview 的宽度和高度。
解决方法 2. - 手动剪辑所需的 subview
您浏览容器 View 中的每个 subview 并且:
- 将剪辑应用到您想要的任何 subview
- 将圆角半径应用于您剪辑的 View
- 保持容器 View 不被裁剪并且没有圆角半径
为此,我为容器 View 创建了一个自定义 UIView 子类
class ClippingSubView: UIView
{
    override var clipsToBounds: Bool
    {
        didSet
        {
            if clipsToBounds
            {
                clipsToBounds = false
                clipImageViews(in: self)
                layer.cornerRadius = 0
            }
        }
    }

    // Recursively go through all subviews
    private func clipImageViews(in view: UIView)
    {
        for subview in view.subviews
        {
            // I am only checking image view, you could check which you want
            if subview is UIImageView
            {
                print(layer.cornerRadius)
                subview.layer.cornerRadius = layer.cornerRadius
                subview.clipsToBounds = true
            }

            clipImageViews(in: subview)
        }
    }
}
然后确保在创建 View 时调整以下行:
let mainContainerView = ClippingSubView()

// Do this only after you have added all the subviews for this to work
mainContainerView.layer.cornerRadius = 50
mainContainerView.clipsToBounds = true
这给了我你想要的输出

关于ios - 剪辑以限制 subview 内的特定 View ,我们在Stack Overflow上找到一个类似的问题: https://stackoverflow.com/questions/70850744/