尝试用不同的颜色绘制每个立方体面,我发现了 thread这提供了一种实现这一目标的方法:
var geometry = new THREE.BoxGeometry(5, 5, 5);
for (var i = 0; i < geometry.faces.length; i++) {
    geometry.faces[i].color.setHex(Math.random() * 0xffffff);
}

var material = new THREE.MeshBasicMaterial({
    color: 0xffffff,
    vertexColors: THREE.FaceColors
});
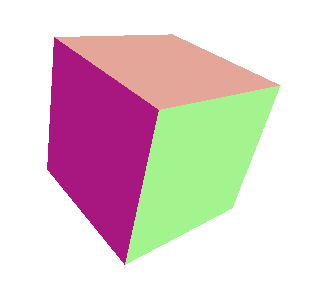
但是使用 Three.js r86,我得到以下结果:

得到构成每个面的三 Angular 形,单独绘制。
为了达到理想的效果,我对上述代码进行了以下修改:
var geometry = new THREE.BoxGeometry(5, 5, 5);
for ( var i = 0; i < geometry.faces.length; i += 2 ) {
    var faceColor = Math.random() * 0xffffff;
    geometry.faces[i].color.setHex(faceColor);
    geometry.faces[i+1].color.setHex(faceColor);
}

var material = new THREE.MeshBasicMaterial({
    color: 0xffffff,
    vertexColors: THREE.FaceColors
});
但这一切似乎有点过头了!
'use strict';

var camera, scene, renderer, cube;

init();
render();

function init() {

  scene = new THREE.Scene();
  camera = new THREE.PerspectiveCamera(75, window.innerWidth / window.innerHeight, 0.1, 1000);

  // renderer

  renderer = new THREE.WebGLRenderer({
    alpha: true
  });
  renderer.setSize(window.innerWidth, window.innerHeight);
  document.body.appendChild(renderer.domElement);

  camera.position.z = 12;

  // Mesh - cube

  var geometry = new THREE.BoxGeometry(5, 5, 5);
  for (var i = 0; i < geometry.faces.length; i += 2) {
    var faceColor = Math.random() * 0xffffff;
    geometry.faces[i].color.setHex(faceColor);
    geometry.faces[i + 1].color.setHex(faceColor);
  }

  var material = new THREE.MeshBasicMaterial({
    color: 0xffffff,
    vertexColors: THREE.FaceColors
  });

  cube = new THREE.Mesh(geometry, material);
  scene.add(cube);

  // Light

  var pointLight = new THREE.PointLight(0xFFFFFF);

  pointLight.position.x = 10;
  pointLight.position.y = 50;
  pointLight.position.z = 130;

  scene.add(pointLight);

}

function render() {

  cube.rotation.x = 16;
  cube.rotation.y = 4;
  cube.rotation.z -= 5;

  renderer.render(scene, camera);

}
body,
canvas {
margin: 0;
padding: 0;
}
body {
overflow: hidden;
background-color: #fff;
}<script src="https://cdnjs.cloudflare.com/ajax/libs/three.js/86/three.js"></script>我是否缺少 Three.js 上的某些东西来完成整个面部绘制?
最佳答案
如果您切换到 BufferGeometry,您可以使用groups 来控制几何体部分的 Material 。组基于顶点索引,并允许您定义 Material 索引,该索引将引用 Material 数组中的 Material 。
考虑:
// start, count, material index
bufferGeometry.addGroup(12, 6, 2)
这告诉几何体在索引索引 12 处开始一组新的三 Angular 形,并占 6 个索引(引用 6 个顶点)。最后一个参数告诉三 Angular 形组使用 Material 索引 2(用于创建网格的 Material 数组的索引 2)。
在下面的示例中,我为立方体的每一面指定了不同的颜色。您可能认为这与设置面部颜色的效果相同,但请注意,这是为每个组设置一个 Material ,而不仅仅是颜色,这可以创建一些非常酷的效果。
var renderer, scene, camera, controls, stats, mesh;

var WIDTH = window.innerWidth,
  HEIGHT = window.innerHeight,
  FOV = 35,
  NEAR = 1,
  FAR = 1000;

function populateScene() {
  var bg = new THREE.BufferGeometry();
  bg.addAttribute("position", new THREE.BufferAttribute(new Float32Array([
    // front
    -1, 1, 1, // 0
    -1, -1, 1, // 1
    1, 1, 1, // 2
    1, -1, 1, // 3
    // right
    1, 1, 1, // 4
    1, -1, 1, // 5
    1, 1, -1, // 6
    1, -1, -1, // 7
    // back
    1, 1, -1, // 8
    1, -1, -1, // 9
    -1, 1, -1, // 10
    -1, -1, -1, // 11
    // left
    -1, 1, -1, // 12
    -1, -1, -1, // 13
    -1, 1, 1, // 14
    -1, -1, 1, // 15
    // top
    -1, 1, -1, // 16
    -1, 1, 1, // 17
    1, 1, -1, // 18
    1, 1, 1, // 19
    // bottom
    -1, -1, 1, // 20
    -1, -1, -1, // 21
    1, -1, 1, // 22
    1, -1, -1 // 23
  ]), 3));
  bg.addAttribute("normal", new THREE.BufferAttribute(new Float32Array([
    // front
    0, 0, 1, // 0
    0, 0, 1, // 1
    0, 0, 1, // 2
    0, 0, 1, // 3
    // right
    1, 0, 0, // 4
    1, 0, 0, // 5
    1, 0, 0, // 6
    1, 0, 0, // 7
    // back
    0, 0, -1, // 8
    0, 0, -1, // 9
    0, 0, -1, // 10
    0, 0, -1, // 11
    // left
    -1, 0, 0, // 12
    -1, 0, 0, // 13
    -1, 0, 0, // 14
    -1, 0, 0, // 15
    // top
    0, 1, 0, // 16
    0, 1, 0, // 17
    0, 1, 0, // 18
    0, 1, 0, // 19
    // bottom
    0, -1, 0, // 20
    0, -1, 0, // 21
    0, -1, 0, // 22
    0, -1, 0 // 23
  ]), 3));
  bg.setIndex(new THREE.BufferAttribute(new Uint32Array([
    // front 0
    0, 1, 2,
    3, 2, 1,
    // right 6
    4, 5, 6,
    7, 6, 5,
    // back 12
    8, 9, 10,
    11, 10, 9,
    // left 18
    12, 13, 14,
    15, 14, 13,
    // top 24
    16, 17, 18,
    19, 18, 17,
    // bottom 30
    20, 21, 22,
    23, 22, 21
  ]), 1));

  bg.clearGroups();
  // start, count, material index
  bg.addGroup(0, 6, 0);
  bg.addGroup(6, 6, 1);
  bg.addGroup(12, 6, 2);
  bg.addGroup(18, 6, 3);
  bg.addGroup(24, 6, 4);
  bg.addGroup(30, 6, 5);

  var materials = [
    new THREE.MeshLambertMaterial({color:"red"}),
    new THREE.MeshLambertMaterial({color:"green"}),
    new THREE.MeshLambertMaterial({color:"blue"}),
    new THREE.MeshLambertMaterial({color:"cyan"}),
    new THREE.MeshLambertMaterial({color:"magenta"}),
    new THREE.MeshLambertMaterial({color:"yellow"})
  ];

  mesh = new THREE.Mesh(bg, materials);
  mesh.scale.set(5, 5, 5);

  scene.add(mesh);
}

function init() {
  document.body.style.backgroundColor = "slateGray";

  renderer = new THREE.WebGLRenderer({
    antialias: true,
    alpha: true
  });
  renderer.shadowMap.enabled = true;
  renderer.shadowMap.type = THREE.PCFSoftShadowMap;

  document.body.appendChild(renderer.domElement);
  document.body.style.overflow = "hidden";
  document.body.style.margin = "0";
  document.body.style.padding = "0";

  scene = new THREE.Scene();

  camera = new THREE.PerspectiveCamera(FOV, WIDTH / HEIGHT, NEAR, FAR);
  camera.position.z = 50;
  scene.add(camera);

  controls = new THREE.TrackballControls(camera, renderer.domElement);
  controls.dynamicDampingFactor = 0.5;
  controls.rotateSpeed = 3;

  var light = new THREE.PointLight(0xffffff, 1, Infinity);
  camera.add(light);

  stats = new Stats();
  stats.domElement.style.position = 'absolute';
  stats.domElement.style.top = '0';
  document.body.appendChild(stats.domElement);

  resize();
  window.onresize = resize;

  populateScene();

  animate();
}

function resize() {
  WIDTH = window.innerWidth;
  HEIGHT = window.innerHeight;
  if (renderer && camera && controls) {
    renderer.setSize(WIDTH, HEIGHT);
    camera.aspect = WIDTH / HEIGHT;
    camera.updateProjectionMatrix();
    controls.handleResize();
  }
}

function render() {
  renderer.render(scene, camera);
}

function animate() {
  mesh.rotation.x += 0.015;
  mesh.rotation.y += 0.017;
  mesh.rotation.z += 0.019;
  requestAnimationFrame(animate);
  render();
  controls.update();
  stats.update();
}

function threeReady() {
  init();
}

(function() {
  function addScript(url, callback) {
    callback = callback || function() {};
    var script = document.createElement("script");
    script.addEventListener("load", callback);
    script.setAttribute("src", url);
    document.head.appendChild(script);
  }

  addScript("https://threejs.org/build/three.js", function() {
    addScript("https://threejs.org/examples/js/controls/TrackballControls.js", function() {
      addScript("https://threejs.org/examples/js/libs/stats.min.js", function() {
        threeReady();
      })
    })
  })
})();编辑:使用基础 BoxBufferGeometry 添加第二个示例
根据 pailhead 对原始帖子的评论,这里有一个使用未修改的 BoxBufferGeometry 的代码片段。但正如他们在评论中提到的,您仍然需要知道哪个组对应于哪张脸。
var renderer, scene, camera, controls, stats, mesh;

var WIDTH = window.innerWidth,
  HEIGHT = window.innerHeight,
  FOV = 35,
  NEAR = 1,
  FAR = 1000;

function populateScene() {
  var bg = new THREE.BoxBufferGeometry(1, 1, 1);

  var materials = [
    new THREE.MeshLambertMaterial({color:"red"}),
    new THREE.MeshLambertMaterial({color:"green"}),
    new THREE.MeshLambertMaterial({color:"blue"}),
    new THREE.MeshLambertMaterial({color:"cyan"}),
    new THREE.MeshLambertMaterial({color:"magenta"}),
    new THREE.MeshLambertMaterial({color:"yellow"})
  ];

  mesh = new THREE.Mesh(bg, materials);
  mesh.scale.set(10, 10, 10);

  scene.add(mesh);
}

function init() {
  document.body.style.backgroundColor = "slateGray";

  renderer = new THREE.WebGLRenderer({
    antialias: true,
    alpha: true
  });
  renderer.shadowMap.enabled = true;
  renderer.shadowMap.type = THREE.PCFSoftShadowMap;

  document.body.appendChild(renderer.domElement);
  document.body.style.overflow = "hidden";
  document.body.style.margin = "0";
  document.body.style.padding = "0";

  scene = new THREE.Scene();

  camera = new THREE.PerspectiveCamera(FOV, WIDTH / HEIGHT, NEAR, FAR);
  camera.position.z = 50;
  scene.add(camera);

  controls = new THREE.TrackballControls(camera, renderer.domElement);
  controls.dynamicDampingFactor = 0.5;
  controls.rotateSpeed = 3;

  var light = new THREE.PointLight(0xffffff, 1, Infinity);
  camera.add(light);

  stats = new Stats();
  stats.domElement.style.position = 'absolute';
  stats.domElement.style.top = '0';
  document.body.appendChild(stats.domElement);

  resize();
  window.onresize = resize;

  populateScene();

  animate();
}

function resize() {
  WIDTH = window.innerWidth;
  HEIGHT = window.innerHeight;
  if (renderer && camera && controls) {
    renderer.setSize(WIDTH, HEIGHT);
    camera.aspect = WIDTH / HEIGHT;
    camera.updateProjectionMatrix();
    controls.handleResize();
  }
}

function render() {
  renderer.render(scene, camera);
}

function animate() {
  mesh.rotation.x += 0.015;
  mesh.rotation.y += 0.017;
  mesh.rotation.z += 0.019;
  requestAnimationFrame(animate);
  render();
  controls.update();
  stats.update();
}

function threeReady() {
  init();
}

(function() {
  function addScript(url, callback) {
    callback = callback || function() {};
    var script = document.createElement("script");
    script.addEventListener("load", callback);
    script.setAttribute("src", url);
    document.head.appendChild(script);
  }

  addScript("https://threejs.org/build/three.js", function() {
    addScript("https://threejs.org/examples/js/controls/TrackballControls.js", function() {
      addScript("https://threejs.org/examples/js/libs/stats.min.js", function() {
        threeReady();
      })
    })
  })
})();
关于javascript - 将立方体面绘制为一个整体,而不是构成面的三 Angular 形 - Three.js,我们在Stack Overflow上找到一个类似的问题: https://stackoverflow.com/questions/44828713/